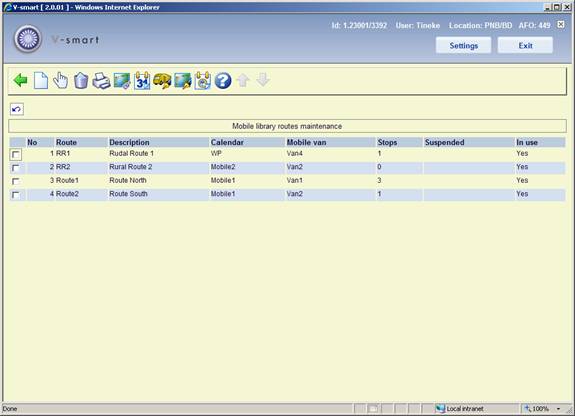
After selecting this option an overview screen will be displayed:
: Use this option to create a new route. See section 449.2.1.
: Select a line and then this option to view the details of the selected route. See section 449.2.1.
: Select a line and then this option to delete the selected route. The system will prompt for confirmation.
: Select a line and then this option to output route the details of borrowers who are associated with the route. The standard screen for generating output will be displayed.
: Select a line and then this option to link stops to the route. See section 449.2.2.
: Select a line and then this option to change due dates for the route. See section 449.3.
: Use this option to view all defined vans. See section 449.2.3.
: Use this option to view all defined stops. See section 449.2.4.
: Select a line and then this option to display the calendar for the selected route. See section 449.2.5.
After selecting the option or an input form will be displayed:
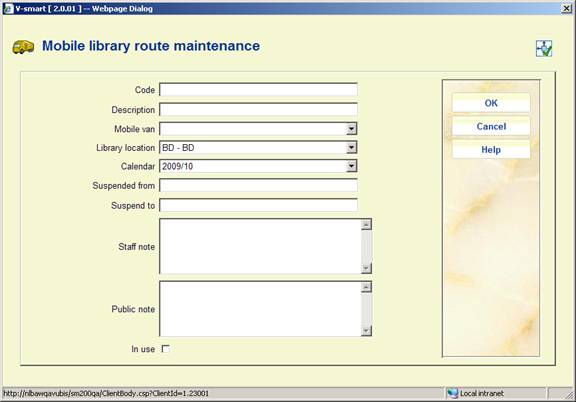
Code: Enter a unique code for the route.
Description: Enter a free text description.
Mobile van: Select a code from the drop-down box for the specific van associated with this route. This is optional.
Library location: Enter the Location code that the mobile route is linked to. This can be a static library or a mobile library, depending on your library setup. This enables circulation transactions to be linked to a specific Location (branch).
Calendar: Select a calendar from the drop-down list (see Calendars above).
Suspended from: Use this to enter a date from when the mobile library stop is temporarily suspended, if applicable.
Suspend to: Use this to enter a date when the mobile library stop will be restored. If the date is unknown you should enter a date far into the future, if applicable.
Staff note: Free text note about the route.
Public note: Note which can be used to display information about the route to borrowers (in the WebOpac or on the library website).
In use: Flag to indicate the route is in use or not in use. During setup of the route you should make the route NOT In use and change it to In use once the setup is completed.
: Select a line and then this option to link stops to the route. After selecting this option an overview screen will be displayed:

: Use this option to link a new stop to the route. See section 449.2.2.1.
: Select a line and then this option to view the details of the selected stop. See section 449.2.2.1.
: Select a line and then this option to delete the stop from the route. The system will prompt for confirmation.
: Select a line and then this option to output route the details of borrowers who are associated with the stop. The standard screen for generating output will be displayed.
: Use this option to view all defined stops. See section 449.2.4.
After selecting the option or an input form will be displayed:

Stop number: Either enter a new stop number or select a stop from the list. See below.
Number in route: Enter the number of the stop within the route.
Arrival time and Departure time: Enter the estimated arrival and departure times. The system does not check whether the time periods overlap, although it will display a warning triangle if times do overlap.
Suspended from: Use this to enter a date from when the mobile library stop is temporarily suspended, if applicable.
Suspend to: Use this to enter a date when the mobile library stop will be restored. If the date is unknown you should enter a date far into the future, if applicable.
Staff note: Free text note about the route.
Public note: Note which can be used to display information about the route to borrowers (in the WebOpac or on the library website).
In use: Check this box if the stop is in use.
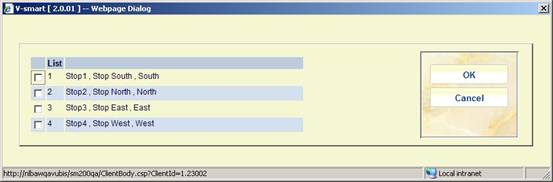
When stops have already been defined (see section 449.2.4) you can use the button which will pop up a list from which you can select a stop:
When you type in a non-existent stop number, a message will be displayed:
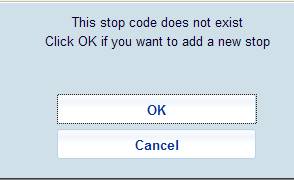
When you click , the form for adding a new stop will be displayed:

See section 449.2.4 for a decription. The only difference is that in this case the field Stop number will be protected and contain the number you entered on the previous form.
: Use this option to view all defined vans. After selecting this option an overview screen will be displayed:
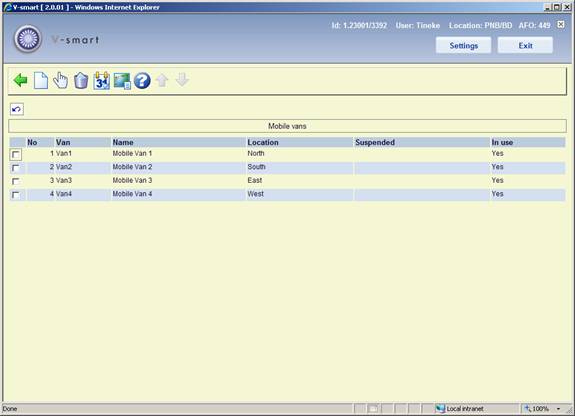
: Use this option to define a new van. See section 449.2.3.1.
: Select a line and then this option to view the details of the selected van. See section 449.2.3.1.
: Select a line and then this option to delete the van definition. The system will prompt for confirmation.
: Select a line and then this option to change due dates for the route. See section 449.3.
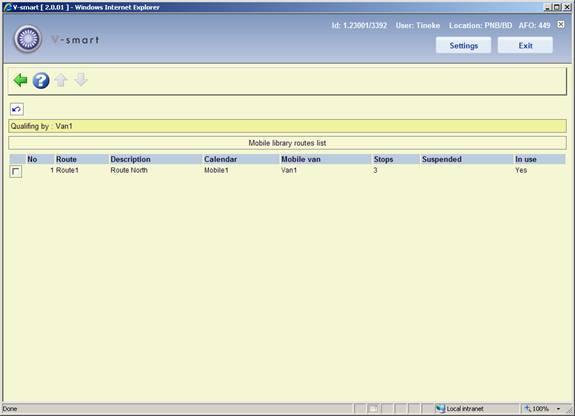
: Select a line and then this option to view the route to which this van is linked. A summary screen will be displayed:
After selecting the option or an input form will be displayed:

Van: Enter the number/code of the van.
Name: Enter the name of the van.
Location: If the van is designated as an online location, enter the Location code here.
Suspended from: Use this to enter a date from when the mobile library stop is temporarily suspended, if applicable.
Suspend to: Use this to enter a date when the mobile library stop will be restored. If the date is unknown you should enter a date far into the future, if applicable.
Staff note: Free text note about the route.
In use: Check this box if the van is in use.
: Use this option to view all defined stops. After selecting this option an overview screen will be displayed:

: Use this option to define a new stop. See section 449.2.4.1.
: Select a line and then this option to view the details of the selected stop. See section 449.2.4.1.
: Select a line and then this option to delete the stop definition. The system will prompt for confirmation.
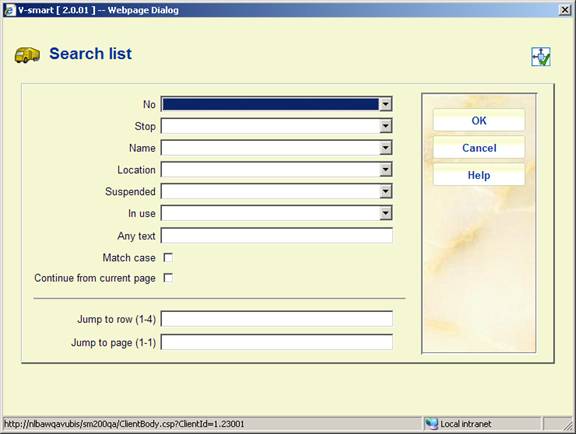
: After selectimg this option an input form will be displayed with search criteria. After selecting a criterion and clicking , the screen will be redisplayed with information matching the criterion.
: Select a line and then this option to change due dates for the route. See section 449.3.
: Select a line and then this option to output view the routeto which this van is linked. A summary screen will be displayed:

After selecting the option or an input form will be displayed:

Stop number: Enter a Stop number. This can be alpha, numeric, or alphanumeric.
Name: Enter a name for the stop.
Location: This is usually the village, district, etc.
Address and Postcode: Optionally an address and post code can be added.
Staff note: Free text note about the route.
Public note: Note which can be used to display information about the route to borrowers (in the WebOpac or on the library website).
Suspended from: Use this to enter a date from when the mobile library stop is temporarily suspended, if applicable.
Suspend to: Use this to enter a date when the mobile library stop will be restored. If the date is unknown you should enter a date far into the future, if applicable.
In use: Check this box if the stop is in use.
: Select a line and then this option to display the calendar for the selected route. After selecting this option an overview screen will be displayed:

You can use the and options to browse back or forwards in time to view the calendar.
The Mobile Library functionality also allows you to change the due dates for a set of borrowers. If the mobile library van is unable to be at a scheduled stop you can move the due date for items due back at that stop to the next expected date that the mobile van will arrive, thus preventing the accumulation of fines for borrowers linked to that stop.
There are various ways of changing due dates. You can do so for a specific location via AFO 448, this is not necessarily related to mobile libraries.
Or you can change the due date for a given route (or a van, or a stop, or a stop within a route). The choices offered when you use the option depend on what position you are starting from.
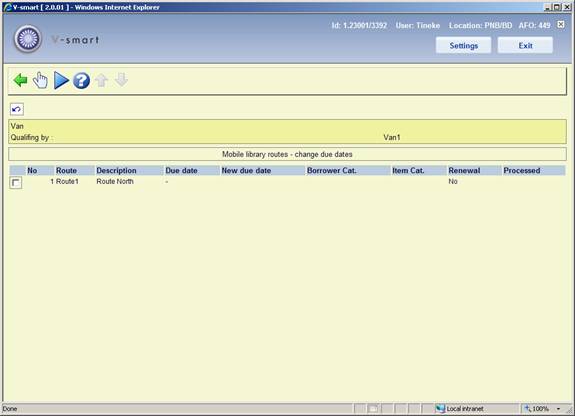
From the main screen of Mobile library routes maintenance select the option . On this screen select a van and then the option .
The Mobile library routes - Change due dates screen is displayed:
Select a route and an input form is displayed:
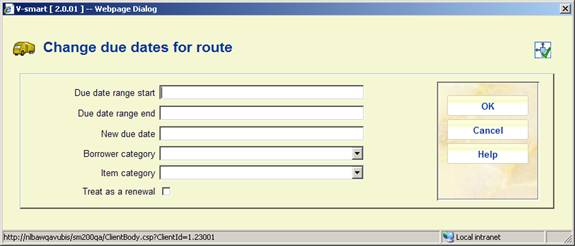
This is similar to the form used to change the due dates globally (AFO 448), except that there is no option to enter a Location.
Enter the date range for when the van will be suspended. If Calendars are used the system will suggest the new due date, otherwise you must enter the new due date manually.
When you click the screen now shows the route that has been amended and the new due date which will apply for dates within the specified date range:

When you have changed all the relevant routes, select the option after which the standard screen for scheduling processes will be displayed.
This process changes the due dates for the items affected.
Note
If a Route has a Calendar the New due date will be calculated according to the specified “open” days.
On the main screen of Mobile library routes maintenance select a route and then the option .
The Mobile library routes - Change due dates screen is displayed. See section 449.3.1 for the necessary steps.
From the main screen of Mobile library routes maintenance select the option . On this screen select a stop and then the option .
The Mobile library routes - Change due dates screen is displayed. See section 449.3.1 for the necessary steps.
After selecting this option a summary screen is displayed:
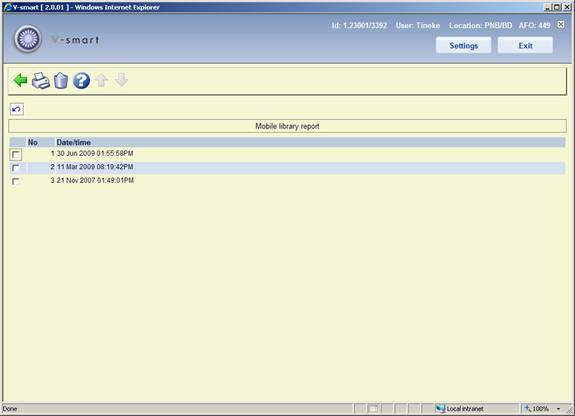
This shows the date and time of all the Change due date processes.
: Select a line and then this option to print the report. The standard screen for outputting information is displayed.
: Select a line and then this option to delete the report. The system will prompt for confirmation.
Sample report:

The report is just a summary of the number of items which were updated by the global change. The details for the items which were affected by the global change on due dates can be obtained via SSP using the circulation transaction application - Transaction type 43 - Change due date. This will give the details of the old date / new date, who executed the change, etc.
Please note
The report is generated at the time the change of the due dates is done. Whatever language you are set to at the time you change the due dates is the language the report is in.
After selecting this option, an input form is displayed:
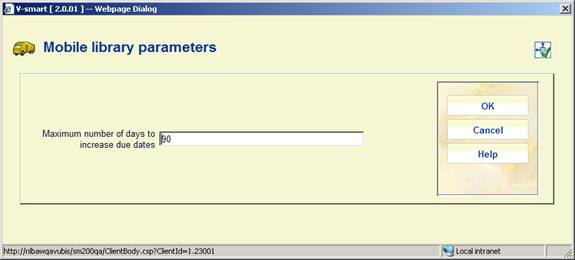
Enter a number of days in the field and click .
This is a system-wide setting that applies an absolute limit on the number of days by which any loan can be extended.
This applies to any due date changes executed for vans, routes or stops via AFO 449.
· Document control - Change History
|
Version |
Date |
Change description |
Author |
|
1.0 |
October 2009 |
creation, new AFO |
|